Wet felting: A quick tutorial and how to with video

Wet felting nother example of what you can produce with your naturally dyed products.
Wet felting
I thought I would do a post this week, on another way in which I regularly use natural dyeing in my craft. Wet felting.
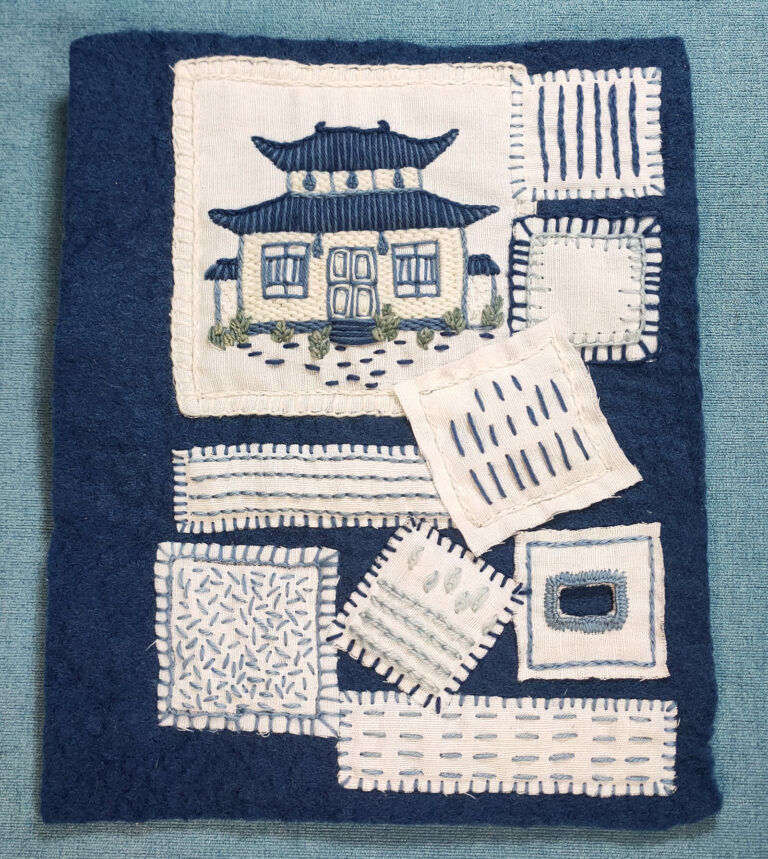
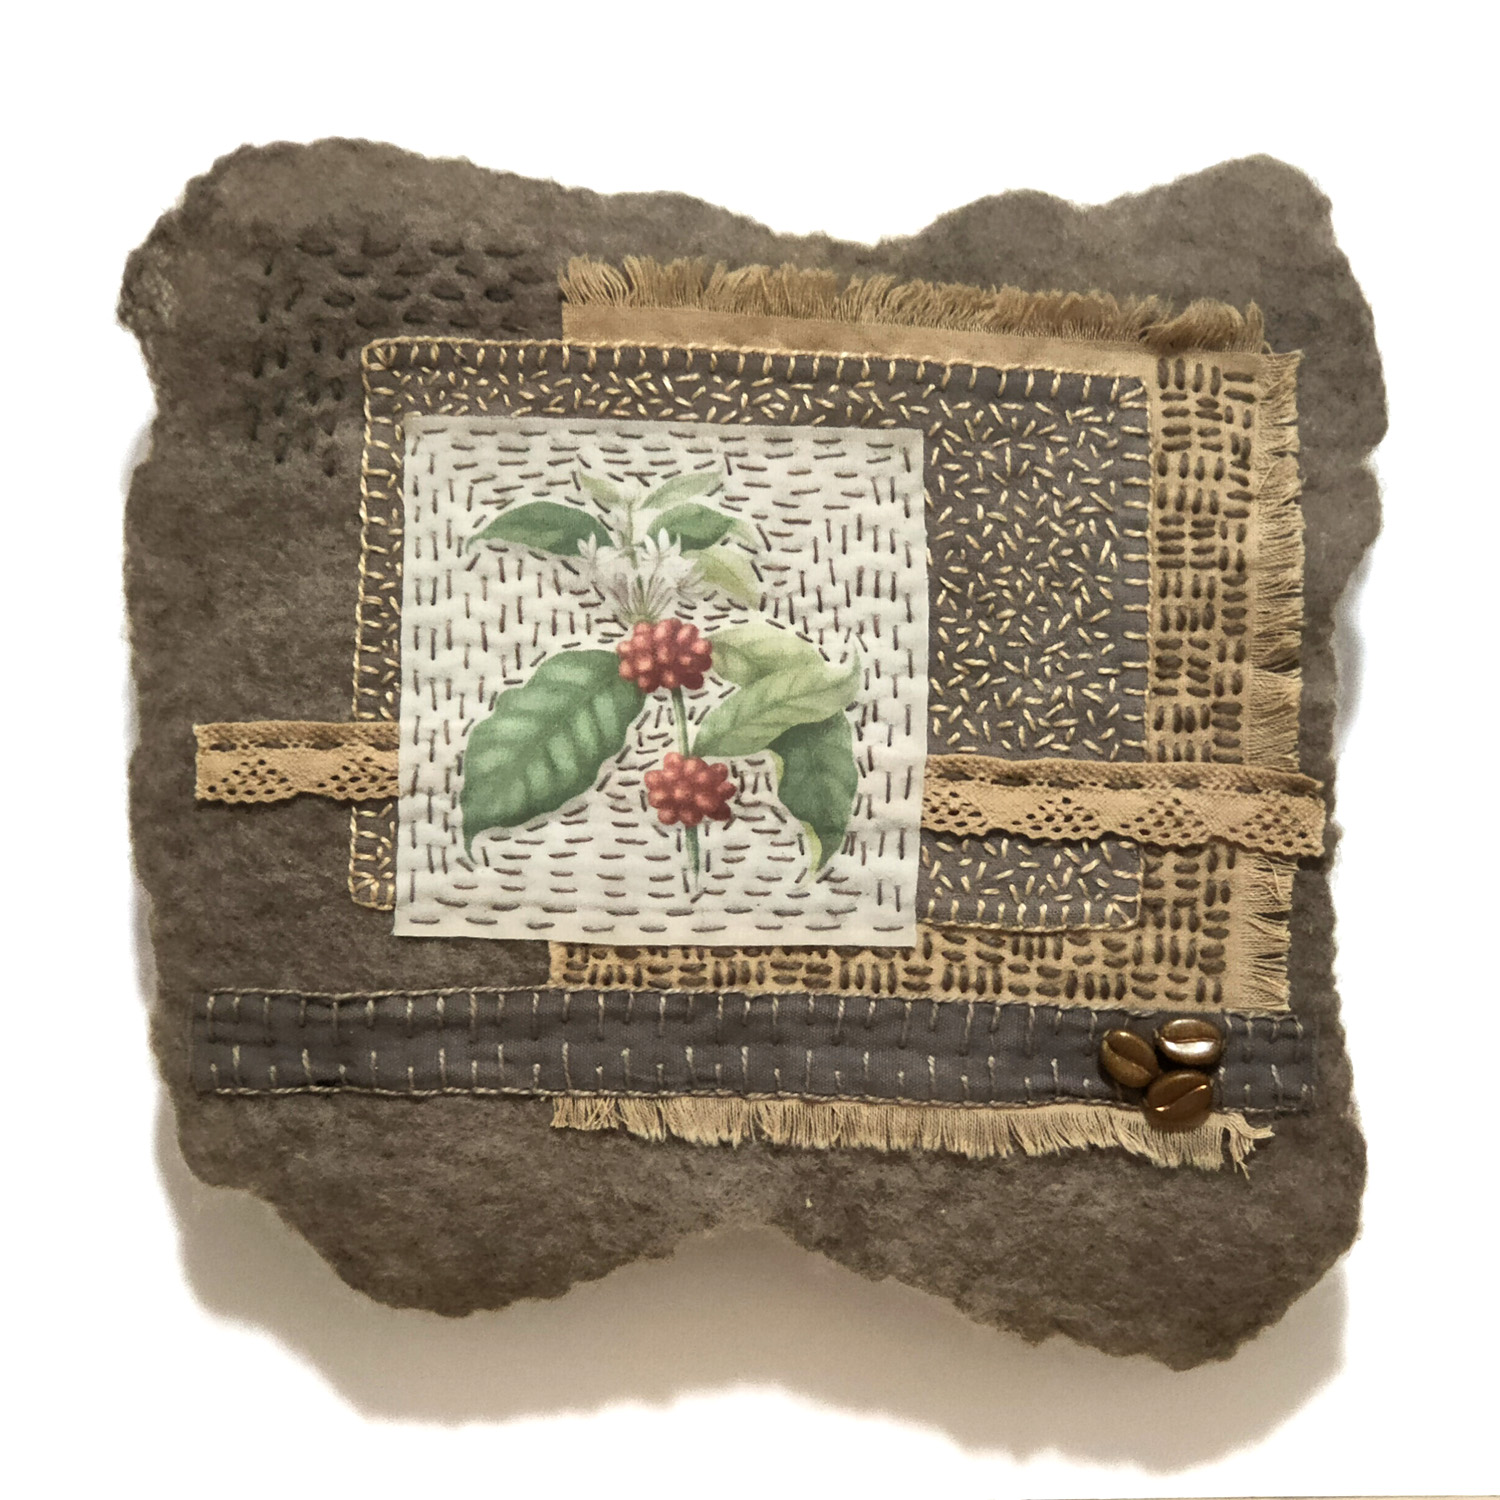
I love producing my own felt for a few different purposes. One of my previous posts was on slow stitching with coffee which showed some slow stitching on a handmade piece of felt. If you would like to look at this tutorial click on the link below.
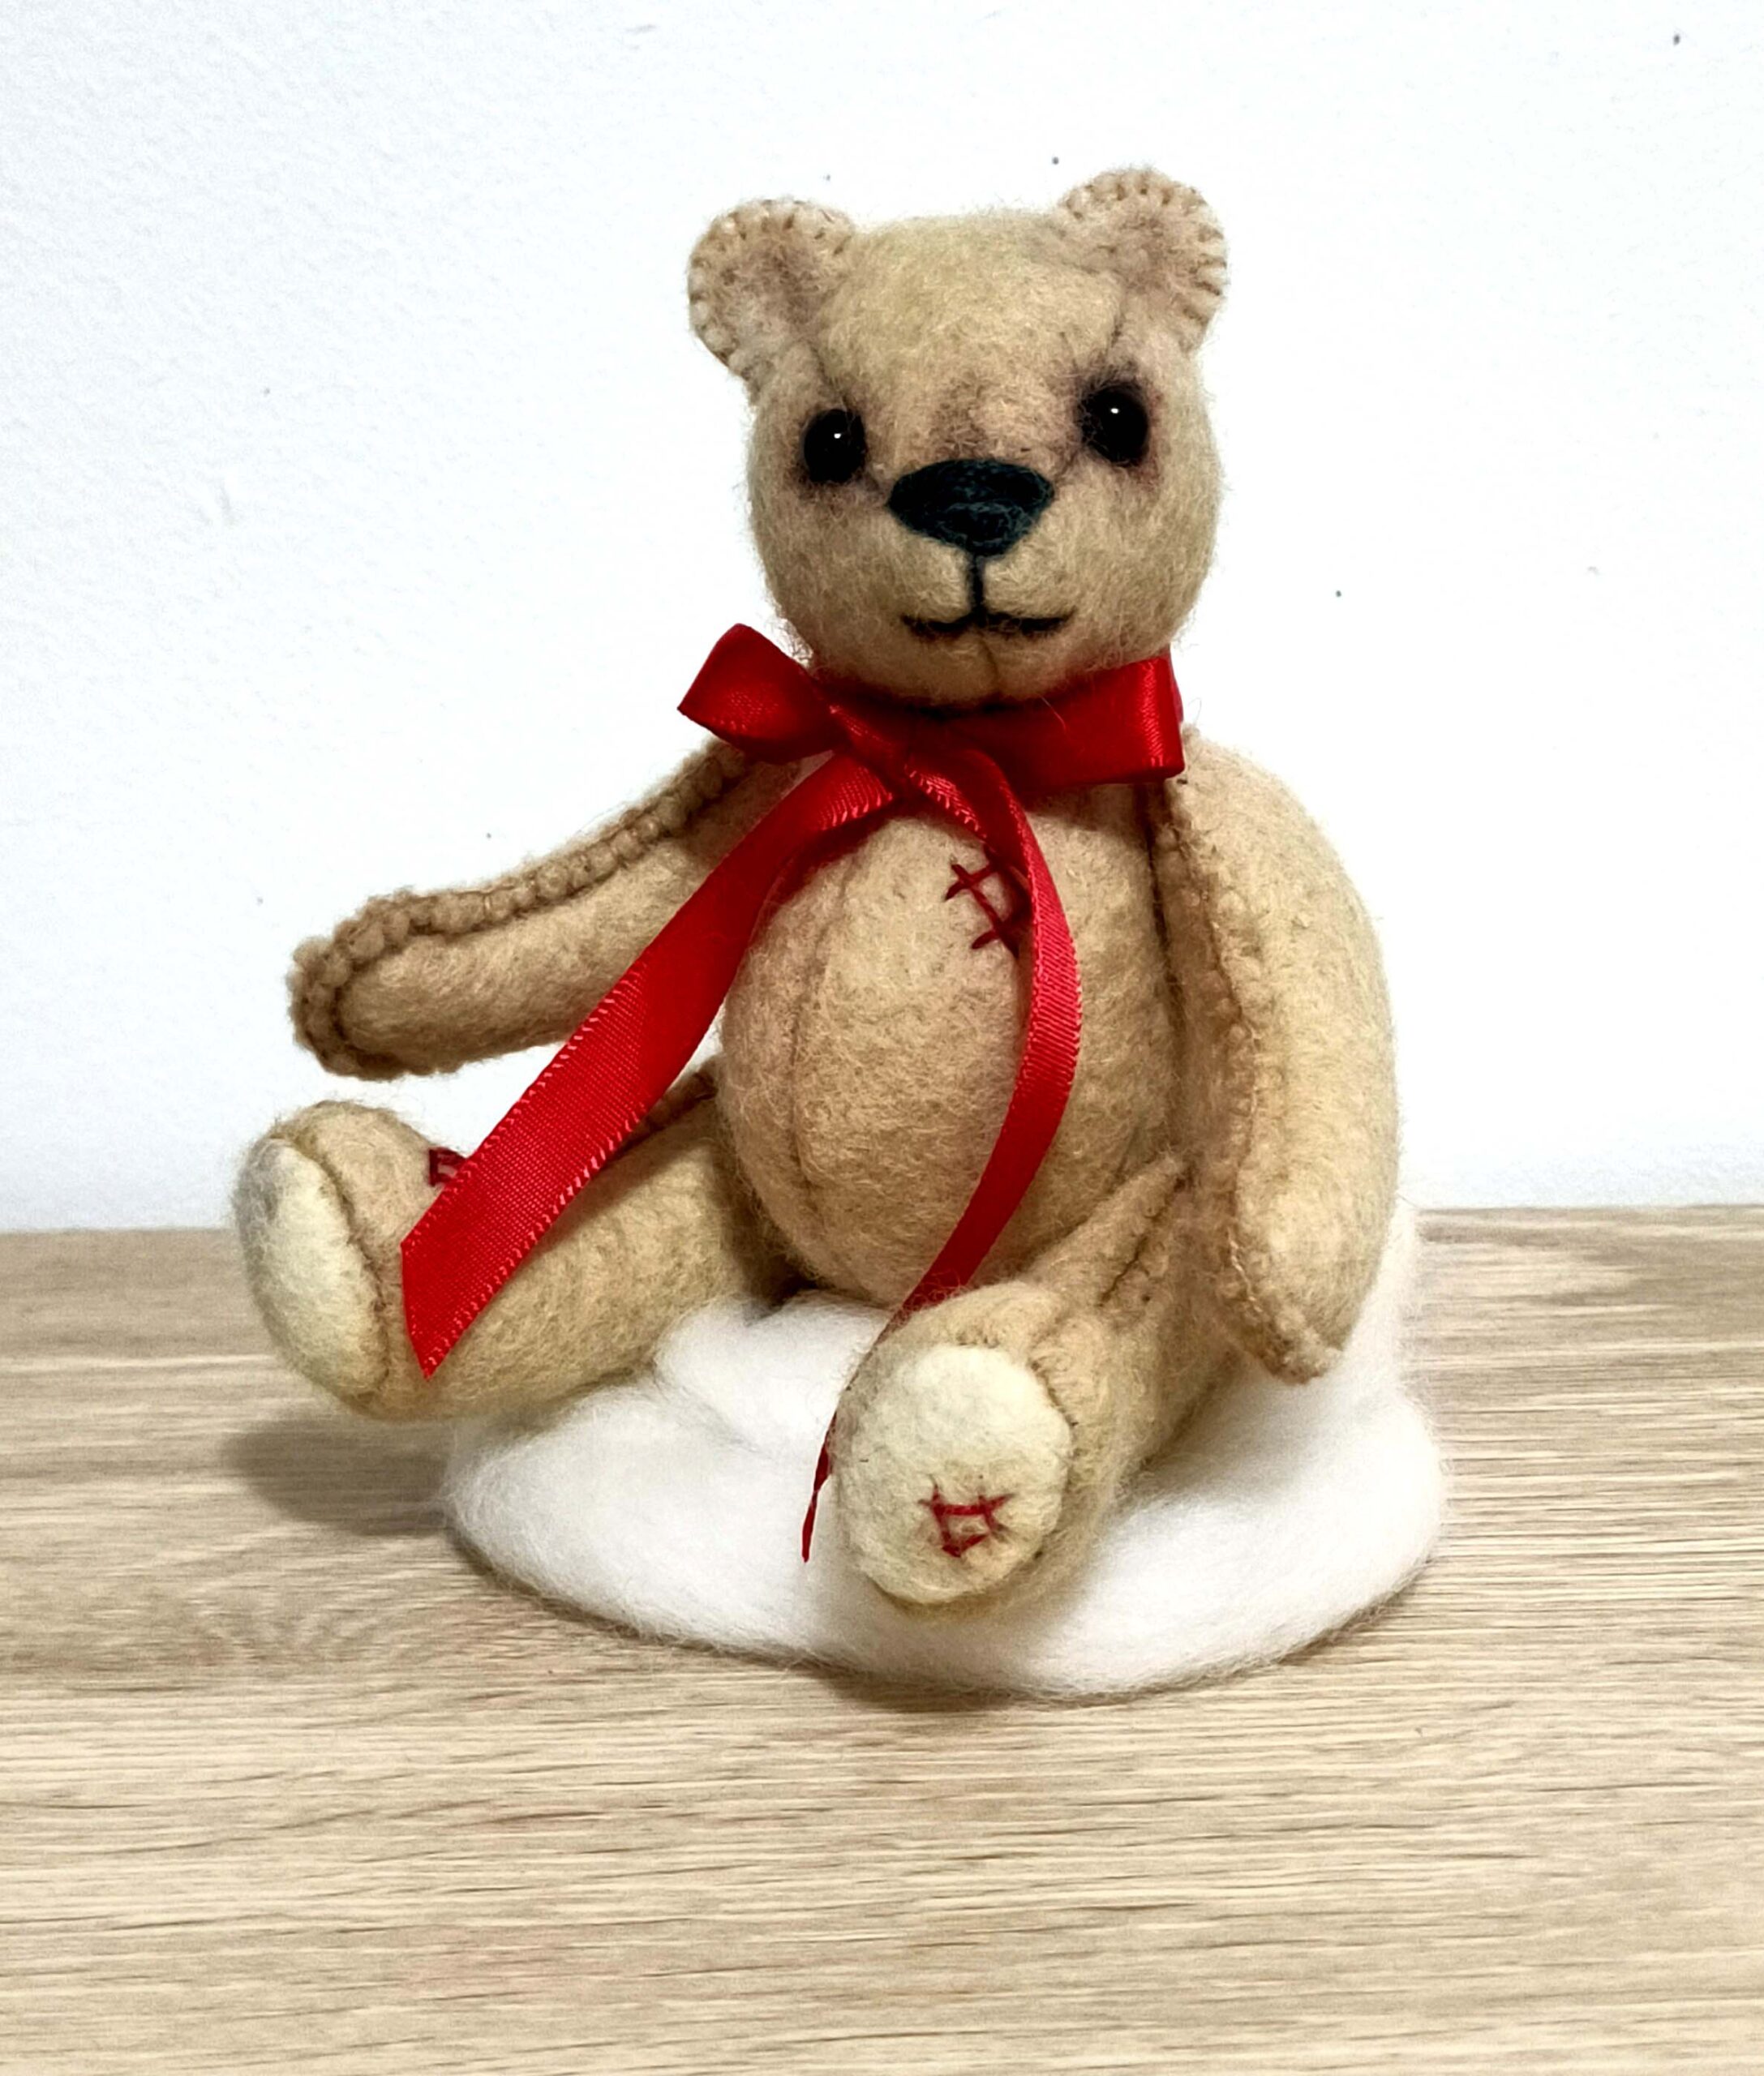
I have also shown in past posts some small characters made from handmade felt. Shown here is a miniature teddy that was made from coffee dyed felt. There is also a picture of my little Eliza Doolittle mouse. In this example the mouse, clothes and basket were made with naturally dyed roving made into felt.
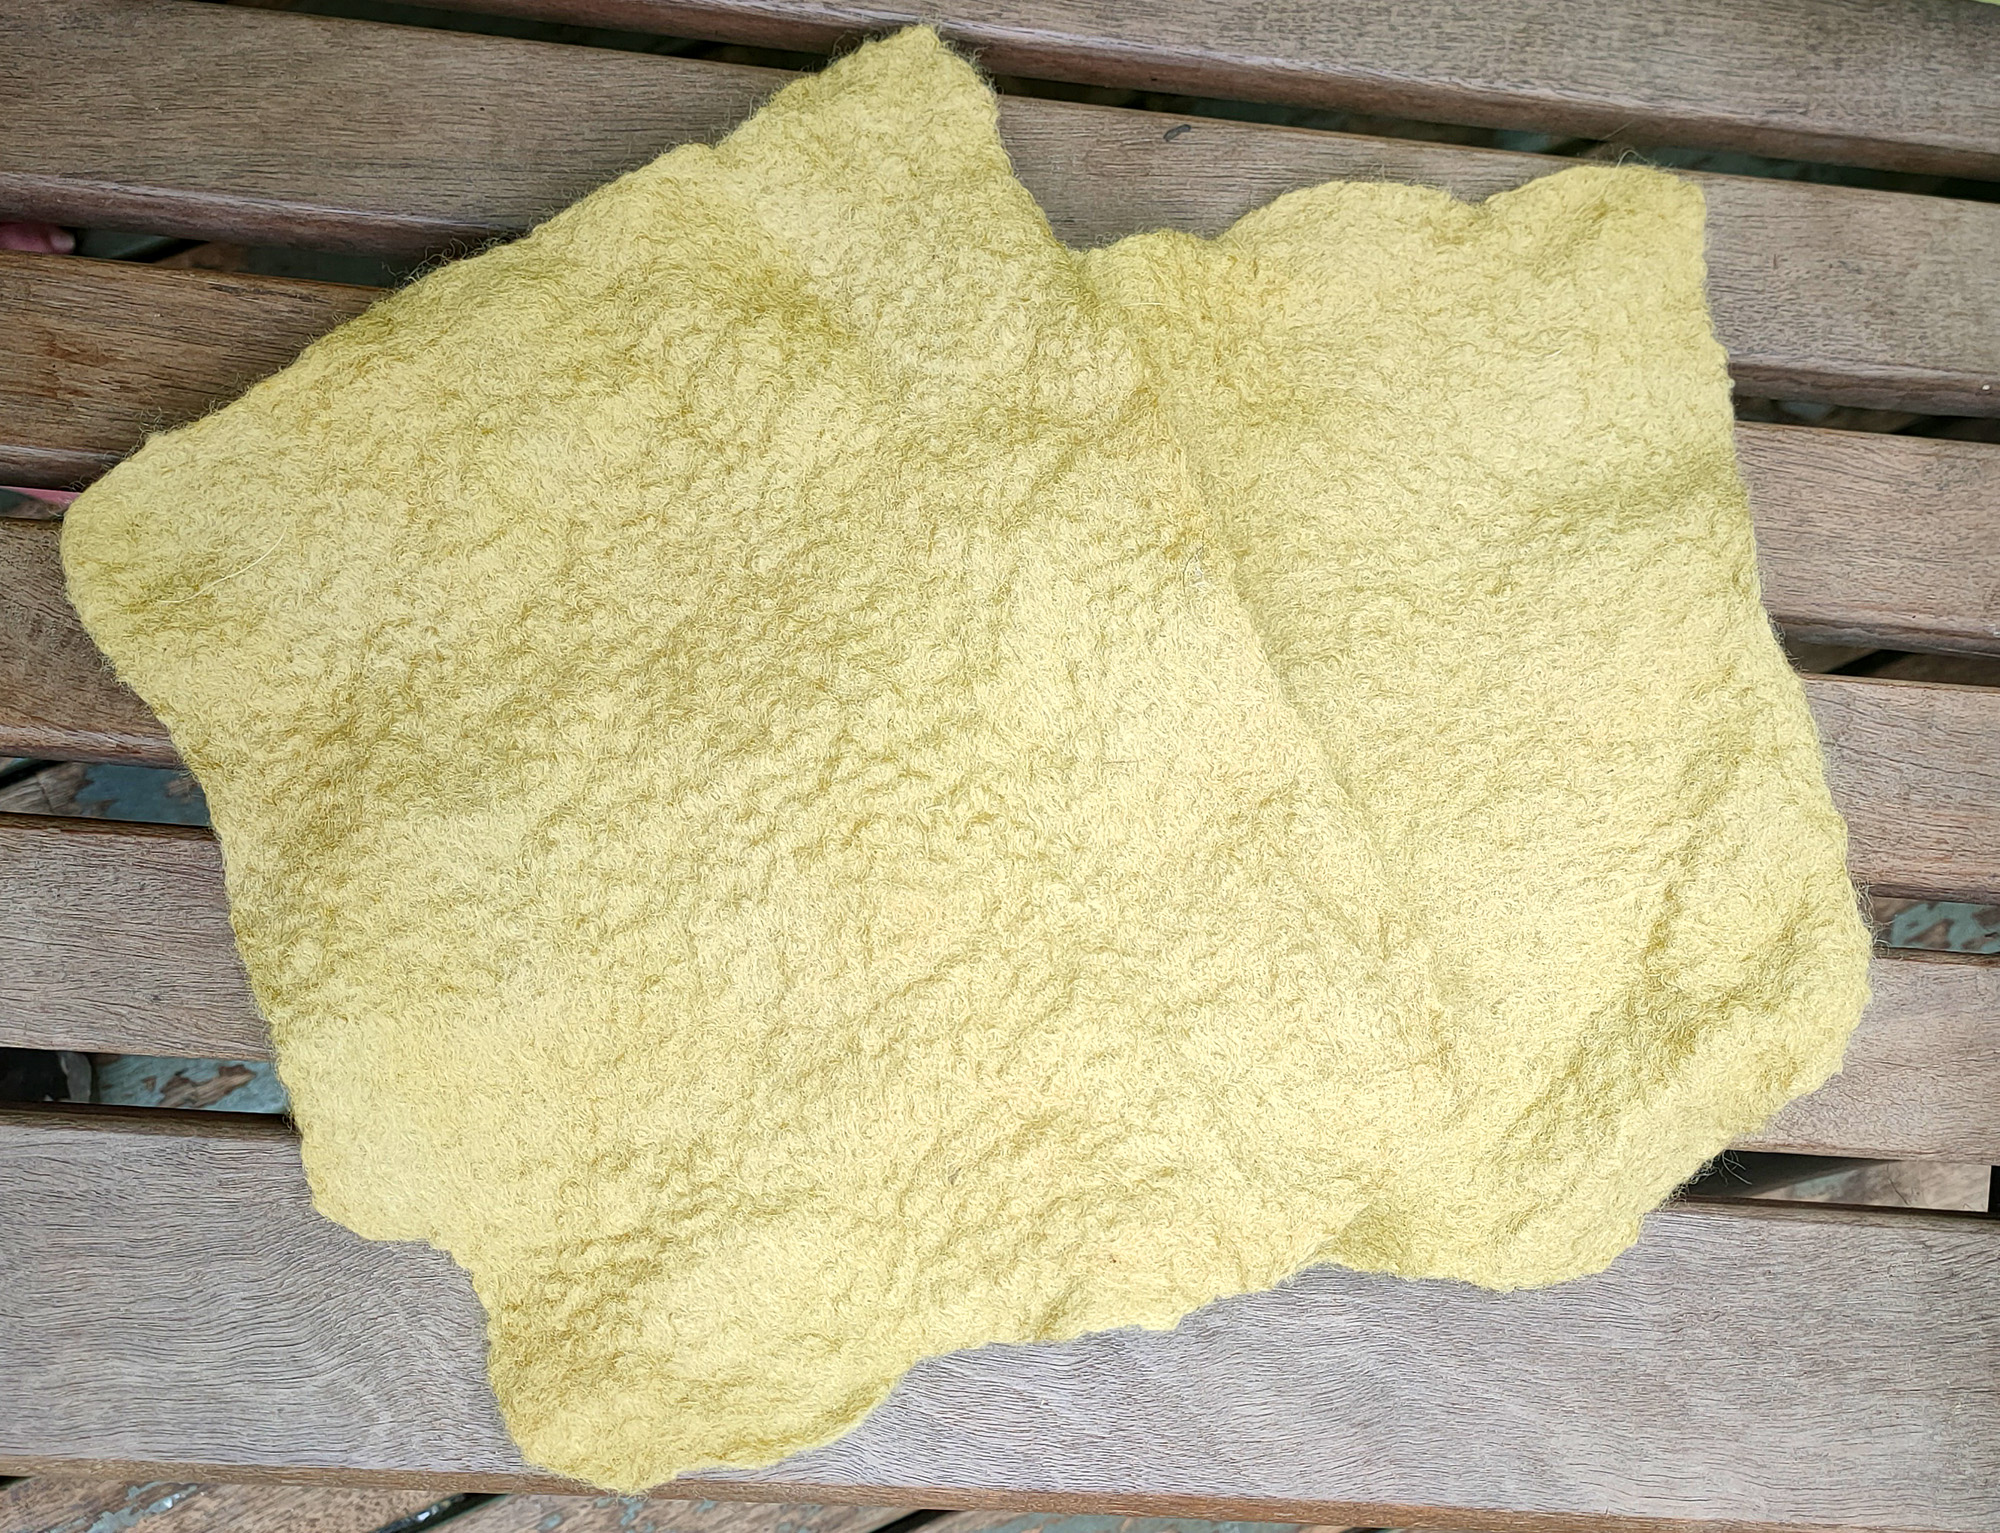
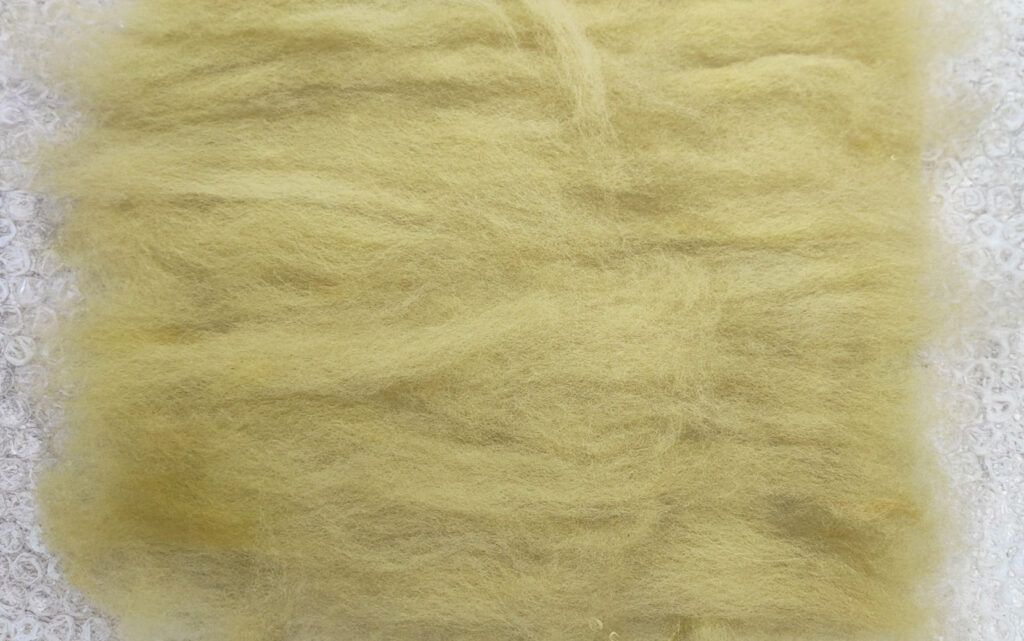
So this week I was making some more felt for my next slow stitch project and decided to make a little video. In this video I am using 100% merino roving that was mordanted with alum and dyed with Henna. If you would like to read more about natural dyeing with Henna click on the link below.
I have added some more detailed written instructions below the video for those who want to give this process a go.

Wet felting
Starting you Wet Felting
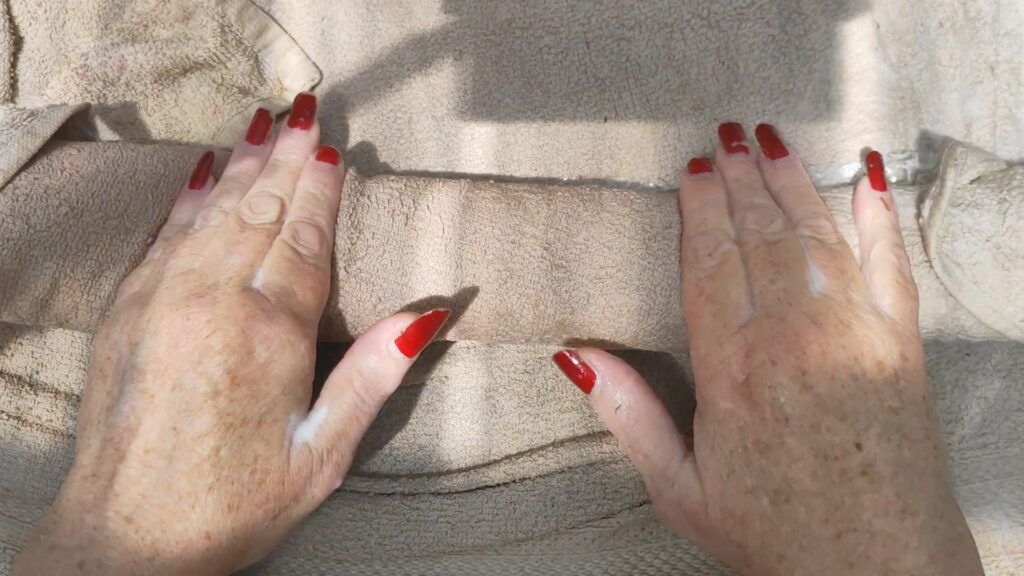
It may be a little hard to see in the picture but I started my wet felting with a few essential items. First a towel goes down on the table. An old towel that will never be used again for any other purpose. The towel is actually folded in 2 with the crease at the top of the picture. I then placed a large piece of bubble wrap on top of the towel. This piece should be much larger than the piece of felt that you want to create. Your felt will reduce in size 30 to 40 percent before we have finished so take that into account when working your starting size. I also have another piece of bubble wrap the same size as the first close by.
Then comes a smaller piece of bubble wrap on top of the larger. This is only for me to use as a guide area for the size I want my piece of felt. You don’t need this unless you are very specific about the size of your felt. Again remember you will need to start with an area 30 to 40 percent larger than your finished piece. For all of your bubble wraps you will want to place the bubbles on top. They are used to agitate the roving into felt.
That is the basic set up before we begin. You will also need a large tub of soapy hot water, soap, sponge and a sushi mat. The soap used for wet felting should always be a gentle ph neutral soap. I like to use olive oil soap or goats milk soap. Whichever is the easiest to find at your local supermarket.
Step 1: Starting with the Roving
The first thing we need to do is get the roving in place. As you can see in the video you pull small sections of roving and place them in a vertical position on top of the Bubble wrap. You want them to slightly overlap each other, across and down the area until it is covered.
Next using your sponge and hot soapy water, wet the roving by squeezing the water out of the sponge. You can now repeat the process but with the roving positioned in a horizontal manner over the top. You are now ready to begin wet felting.
Step 2: Rubbing Your felt
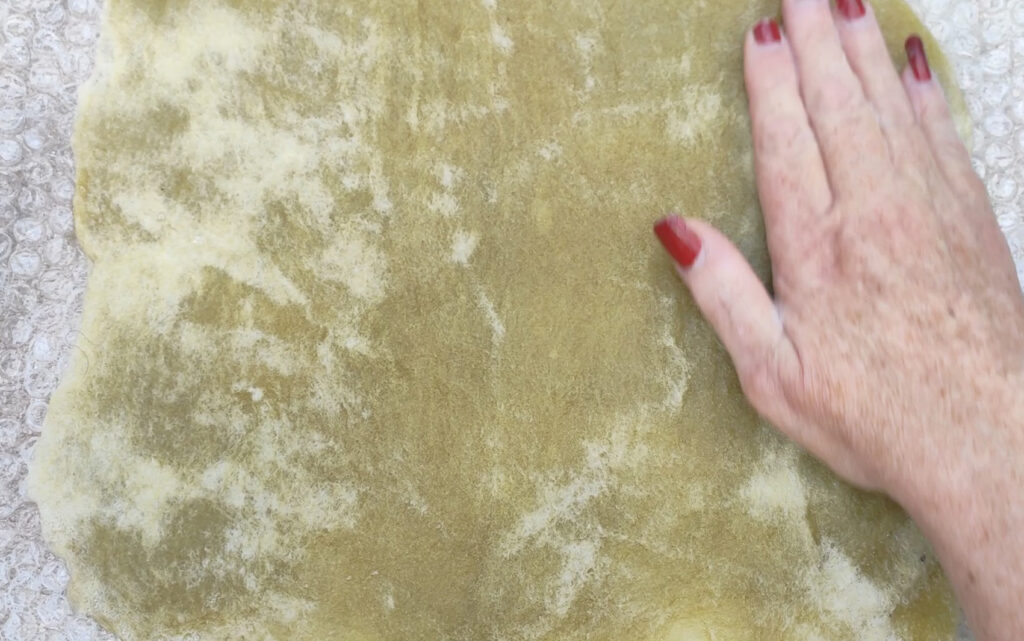
We now need to get the roving nice and wet with the hot soapy water. You can buy a special squeezer bottle to do this but as I don’t mind getting a bit wet I just use a sponge and squeeze the water out. You need to try and make sure you get all of the fibres wet. I will sometimes place the second piece of bubble wrap and gently, very gently, rub to draw the water through the fibres. You do not want to exert too much pressure at this time.
I will then add a little more water if needed and then just use my fingers to gently square up the fibres on the edges. I am not to particular about this as I like a nice organic edge to my piece of felt.
OKay so we are now ready to start rubbing the fibres together. Place the 2nd piece of bubble wrap on top of your roving, bubble side down. Wet your fingers with the soapy water and start gently rubbing your fibres. The soapy water is just to help your fingers slide over the bubble wrap. Again you want to very gently rub. The fibres of wool have little spurs that stick out and we are trying to gently coax the spurs to interlock with each other. If you rub too hard at this point they may just roll over each other without joining. It is best to just use your finger tips and barely touch the surface at this point.
I normally gently rub each section of roving about 10 times before moving to the next section. The size of the section is really up to you and what you find comfortable. I will continue this down the piece of roving. Then take the sandwich (bubble wrap, roving, bubble wrap), do a quarter turn and repeat the rubbing cycle again. By the time you have finished you should have gently rubbed each area of roving 10 times both vertically and horizontally.
You can now take your sandwich and completely flip it over. This now allows you to repeat the whole cycle again on the other side.
Once you have completed the 2nd side you can carefully take off the top layer of bubble wrap (as well as the small piece of wrap if you have used one) and gently rub directly onto the surface. We will be rubbing the exact same way (10 times both horizontally and vertically) though this time you can add a little more pressure onto your finger tips. I do tend to rub with my hand fully stretched out at this stage as I have arthritis in my hands and it is what I find comfortable and easy. Whichever way you rub, the object is now to try and jam those spurs into each other forming a secure join. If you find the roving is balling up a little, or forming a rigid, place your bubble wrap back on top and and give the area a good rub. Once you take the bubble wrap off you should be able to rub the roving directly much easier again.
Once you have turned your piece and rubbed again we now need to flip it over to do the other side. You should find we now have a loose piece of felt. The roving should have joined enough for you to gently pick it up from the bubble wrap and turn it over. Yes you are making fabric!! Now continue with rubbing on this side of your felt.
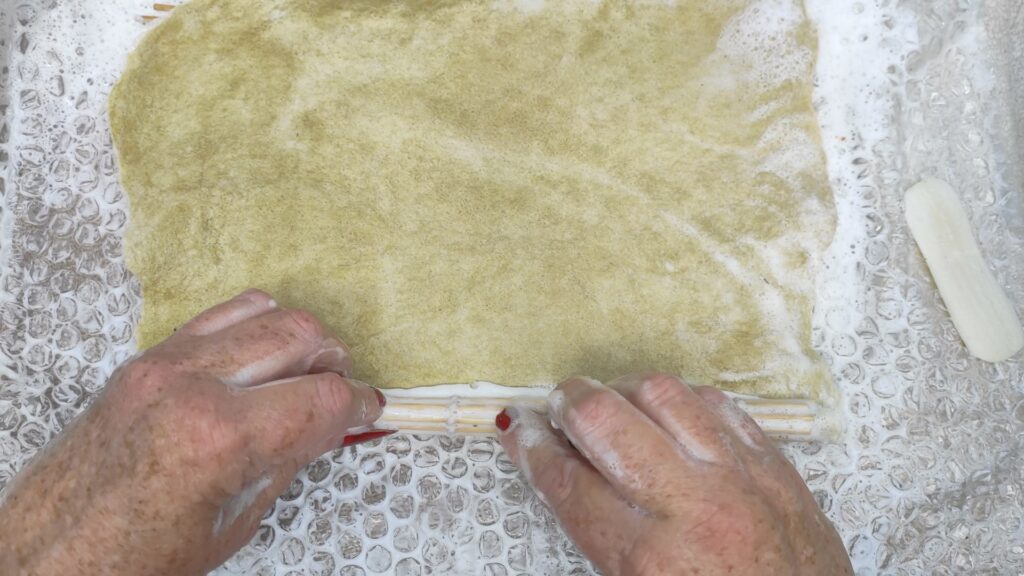
Step 3: Rolling your wet felt
So now we want to start rolling out felt (yep I think we can call it felt now). This will jam the spurs in more and more, causing the felt to shrink and sturdy up at the same time. Place the bubble wrap back on top of your felt with the bubbles down and very tightly roll your sandwich (bubble wrap, felt, bubble wrap) to form a sausage. Now roll this sausage up in the top layer of your towel (remember we doubled it over at the start) so that you can roll the sausage more easily. I then do about 10 rolls back and forth with my hands placed in the centre of the sausage and then ten rolls with my hands on the edges of the sausage. You should be exerting gentle pressure with your hands as you roll. Of course, if I was making a larger piece of felt, I would just gradually move my hands out doing 10 rolls each time, until I got to the end.
Now roll your sausage 1/4 diameter forward and do the 20 rolls again. Complete this 4 times so that each quarter of your sausage has been rolled 20 times giving 80 rolls all up.
Once you have completed your 80 rolls, unroll your sausage, take off the top layer of bubble wrap and turn your felt 1/4 rotation. Basically to the next edge of your square piece of felt. Roll the whole thing up again (with the bubble wrap back on top) and do the whole thing again. You do this rolling action on all 4 edges of the piece of felt , and then turn it over, and do it again on all 4 edges of the other side. By the end you should have completed 640 rolls on your piece of felt, but whose counting right. 20 x 4 turns on one edge giving you 80 rolls per edge. 80 x 4 edges = 320 rolls back and forth. And then turn it over and do another 320 rolls.
Step 4: More rubbing and rolling
Once we have completed the rolling your piece of felt should feel a little more solid and also have shrunk quite a bit. We are now basically going to do the same thing again with a few slight differences. So next we want to have another go at giving the felt a good rub. Place some more soapy water onto the felt and sud up your hands. This time round you want to be a bit more rough with your rubbing. Exert a whole ton of pressure and go hard and fast. Again make sure you rub down both sides of the felt.
Next we are going to roll. This time however we are going to use something which is a bit harsher to the surface of the felt. Instead of rolling your felt up in between layers of bubble wrap, use a sushi mat. Roll it up very tight in the same way. If your piece of felt is larger than the mat, you can place some bubble wrap with it to extend the agitated surface. Again roll up in your towel and away you go. Complete your 640 rolls hard and fast giving your arms a nice work out.
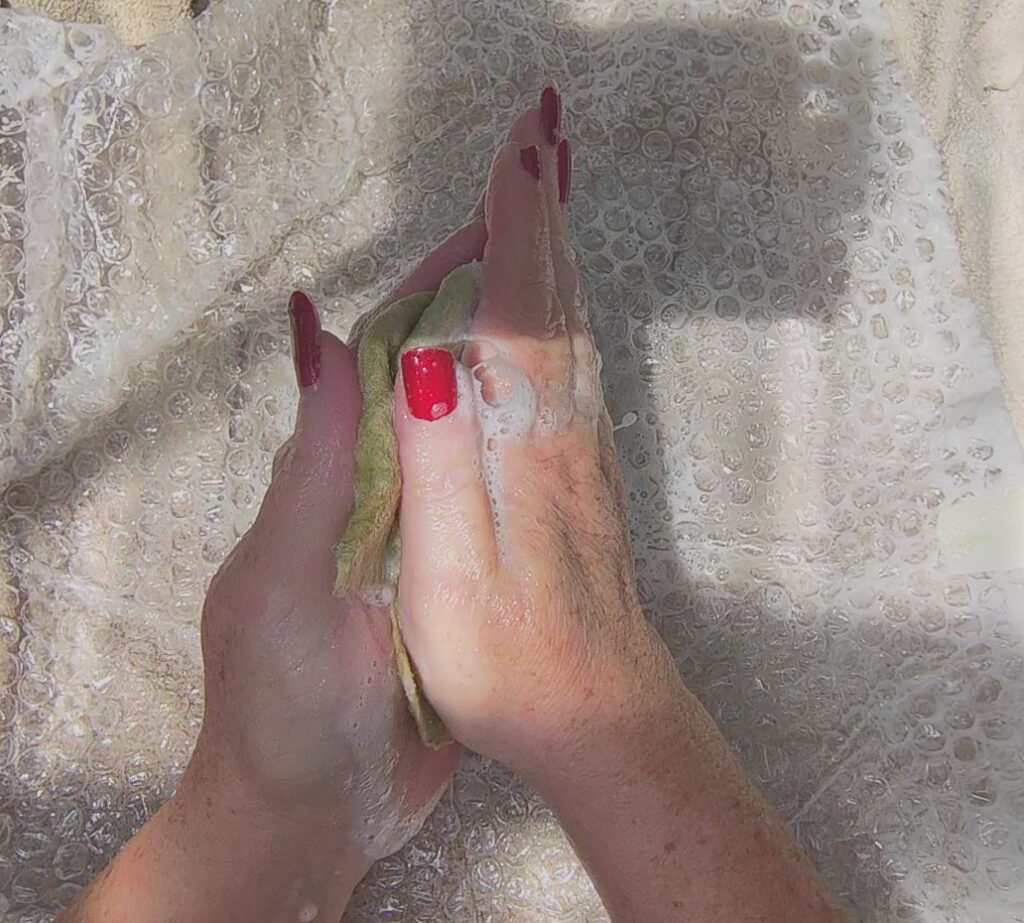
Step 5: Rough Play
We are nearly finished, you should have by now a solid piece of felt. Now the secret to working with wool, whether felting or spinning, is that it does like a little rough play. Its a bit like a massage where someone pummels your back and for some reason your muscles feel more relaxed and not as tight. The same with wool. For this stage, sud your hands up and roughly scrub your felt up against itself. As if you were trying to scrub out a stain but doing it on all sides of the felt. Don’t be shy, your piece of fabric is now complete and will not fall apart.
Now before I do some thwacking, yes thwacking, I do like to give a last little roll of the felt. You don’t have to do this. I just like to get ever last drop of shrinkage out of the felt that I can. A good way to check if you really need to do more rolling is give the fabric a tug in the middle. See if the fabric stretches in your hands. Felt will normally have a little natural stretch in it but if it stretches more than your happy with then give it another roll. Again I am not precious with this. I just chuck it in the mat and roll it a few times on each edge. I definitely do not do another 640 rolls. Just half a dozen rolls on each side, short a sweet. I don’t even bother with the towel at this stage.
If you have done some more rolling, do another minute or 2 of rough play before thwacking it against the the table top. Yep, thats right, we now give it a little bash. Again make sure that you give all sides a bit of a thwack.
Step 6: Rinse and finish
So this last bit is not on the video as I had to go to the sink, but I think you know what to do now. Give your felt a good rinse under a hot tap of running water, making sure to get all of the suds out. I will then give it a few thwacks against the side of the sink and hang out my beautiful felt to dry.
I do hope you have enjoyed this post and that it inspires you to give wet felting a go. It can be quite a meditative thing to do and allows you to spend a bit of time outside creating something beautiful.

Join us on Instagram www.instagram.com/DyetoCraft
Etsy Shop Now open
If you like the idea of using organic naturally dyed threads in your craft but just don’t have the time, come and have a look at our Etsy Shop where you will find an array of beautiful colours provided by nature.