Slow Stitching with Beautiful Indigo: Part 2

Stitching our Indigo Slow Stitch Panel.
The Indigo Panel
If you have read the last post “Slow stitching with Indigo : Part 1 dyeing your cotton”, you will be aware that I am embarking on a long term dyeing project. This project envolves making a slow stitched throw out of my natural dyeing experiments.
In Part 1 we looked at the actual dyeing of both materials and threads using the natural dye of Indigo. In Part 2 we will look at how these experiments have been put together to form the first block of the comforter.
If you would like to read part 1 of this block or how to dye with Indigo please click on the link below.
Starting the Slow Stitch Project
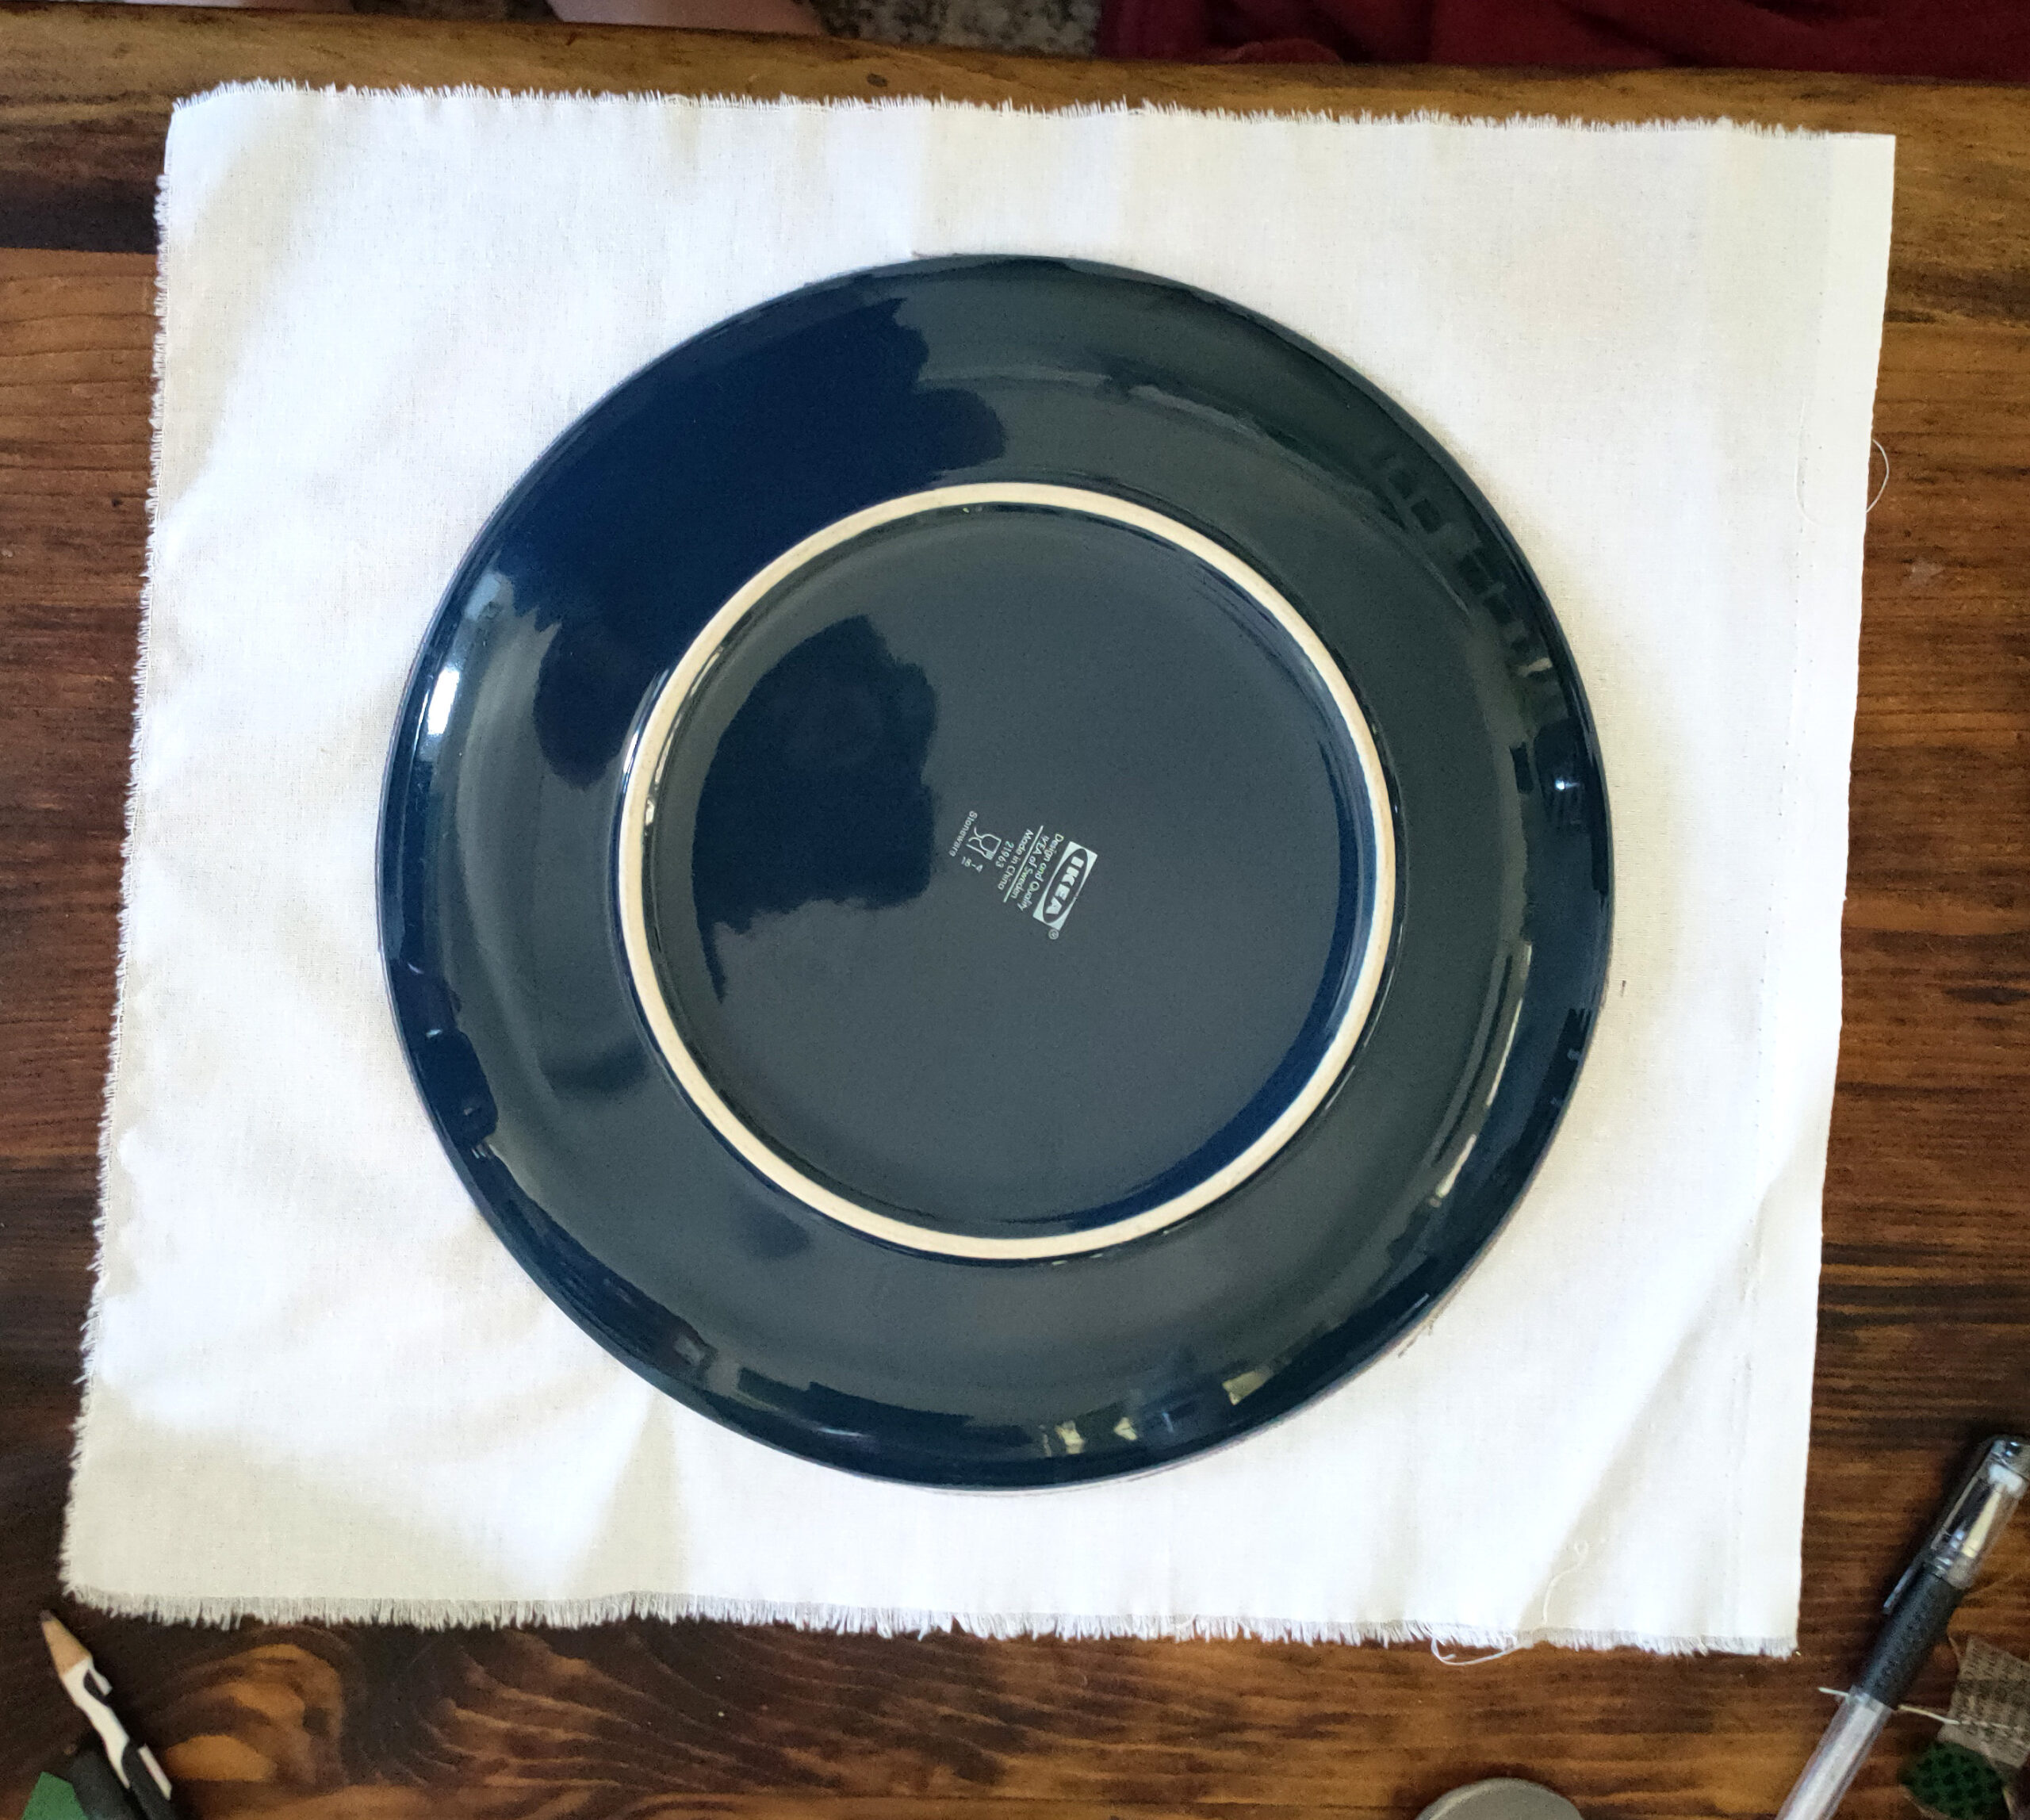
For absolutely no reason I have decided to do my slow stitch in circles! I started with a square of white cotton material approx 40cm x 40cm. I then just took out a dinner plate and used it to draw a circle on my material. Time to start.
I have not taken step by step photos for this block, as slow stitching is really about sitting down and playing, rather than following step by step instructions. So this is more of an overview on how I put this block together to hopefully inspire you to have a play yourself.
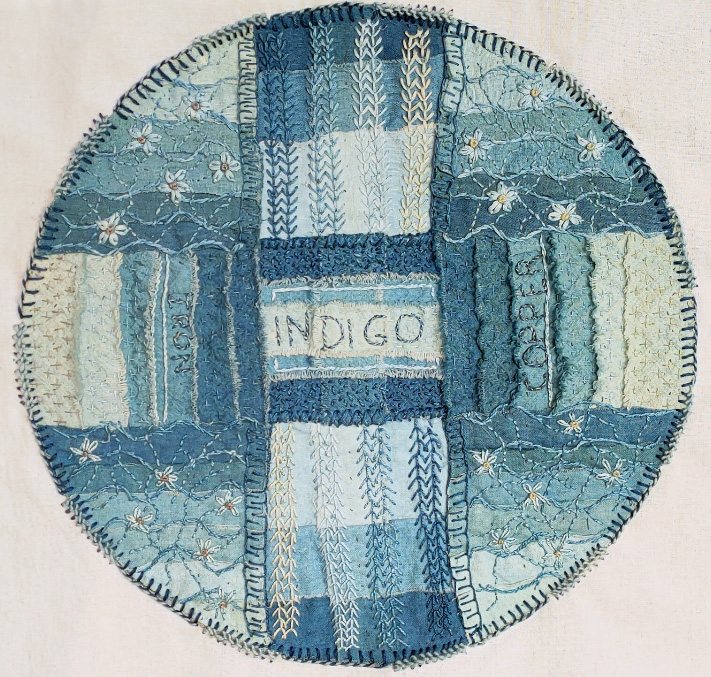
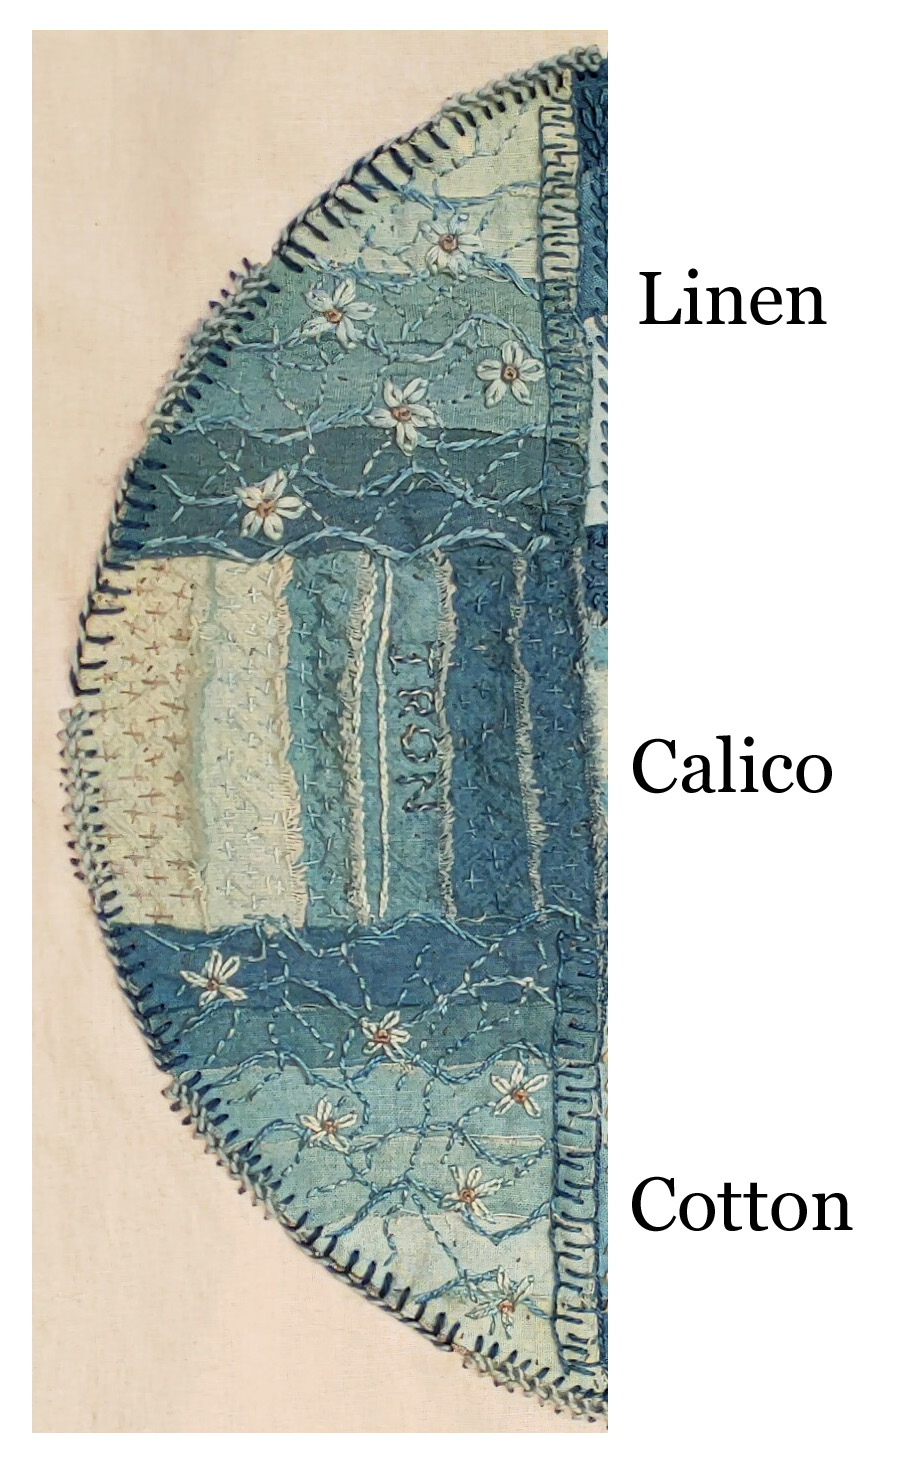
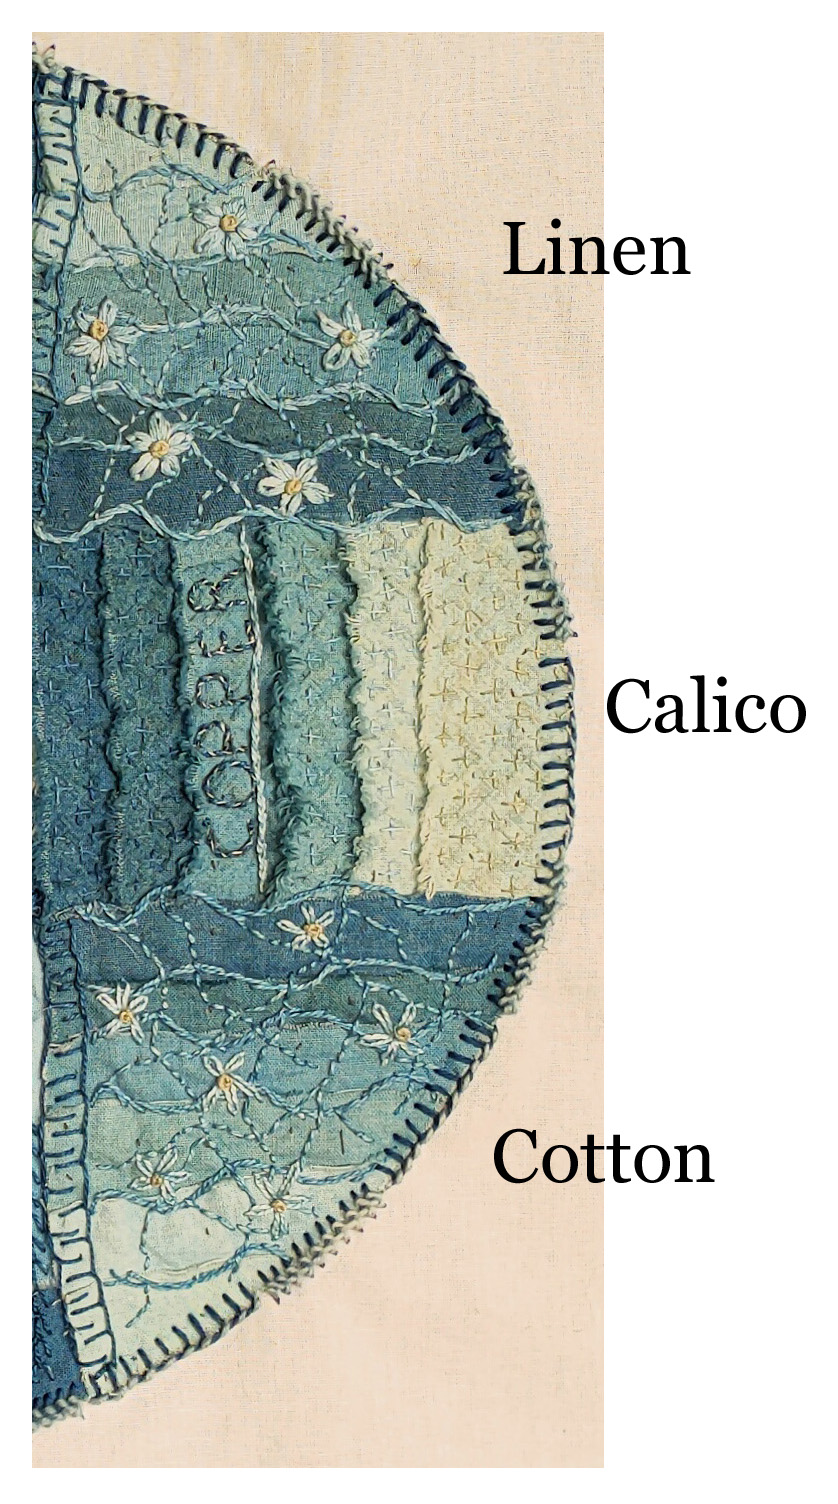
So the circle has basically been broken up into 3 segments. The middle stripe is material and threads dyed with indigo. The section to the left includes all materials and threads that were dyed with indigo and then given a iron bath. The right section is the same but with a copper bath.
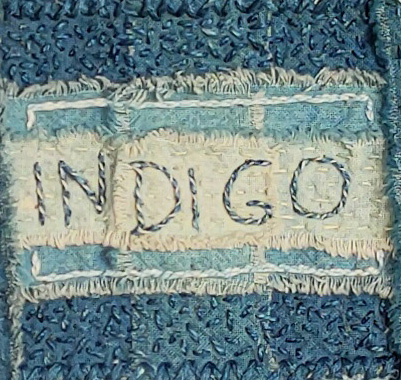
Indigo
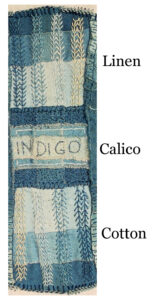
As the picture shows the centre stripe was then divided into a further 3 sections….Linen material, Calico material and cotton material.
Indigo Calico
The section in the middle is made up of all calico material. First 1 piece of dark dyed material was placed down as the background. A small piece of sun tested dark material was then placed in the centre vertically. The mid range indigo fabric was then placed onto top horizontally in the same pattern with the sun tested piece laying down the centre. And then on top of that we have the lighter indigo with the same pattern.
None of the stitching was done until the whole circle was filled and all of the material basted down. But while we are looking at this section, we can have a little look at the stitching involved. Indigo was stitched on top with a whipped back stitch. The back stitch was done with dark indigo perle while the whipped part used light indigo stranded cotton.
Lines of running stitch in light indigo stranded, where then used to hold the light indigo material down. Only one strand of the cotton was used.
The mid range material was sewn down using a rectangle of stem stitch. This was sewn using mid indigo perle cotton.
The edges of the dark indigo material were sewn down using all 6 strands of the dark indigo stranded cotton. This was done with a cross stitch. (sorry you can’t really see the cross stitches in this photo). The dark indigo perle cotton was then used to embroider seed stitch on the rest of the material.
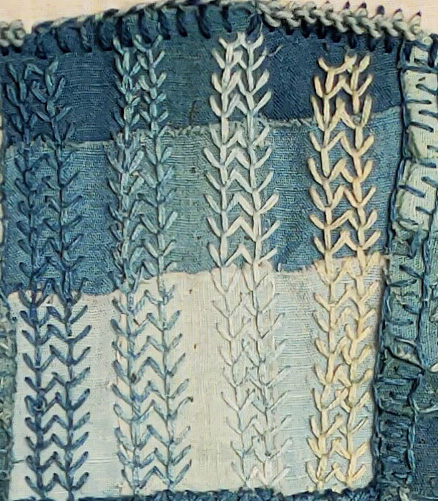
Indigo Linen
The section above the calico, involves our linen blend fabric. As you can see the 3 shades run down towards the centre with the sun tested fabric (only slightly lighter and yellower) running down the centre. 4 strands of stranded cotton were used, running from dark to light across the section. The first row of fly stitch is the dark indigo with the 2nd row being the same threads after sun testing. This pattern continues across the section until all 4 shades are used.
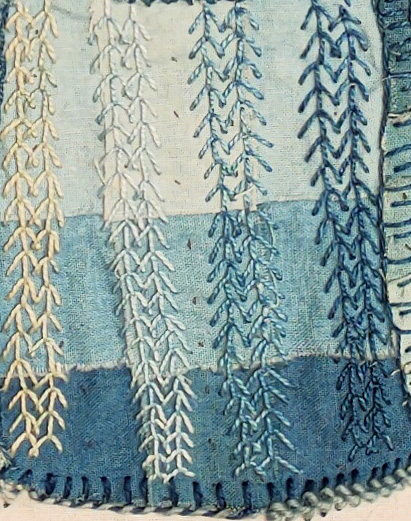
Indigo Cotton
The same pattern is followed under the calico with cotton material. Only in reverse. Stitching was done in the same way but with perle cotton.
Indigo and Iron
To the right of our centre stripe is the indigo and iron dipped fabric. As in the centre stripe, the material runs down the circle with linen, calico and then cotton.
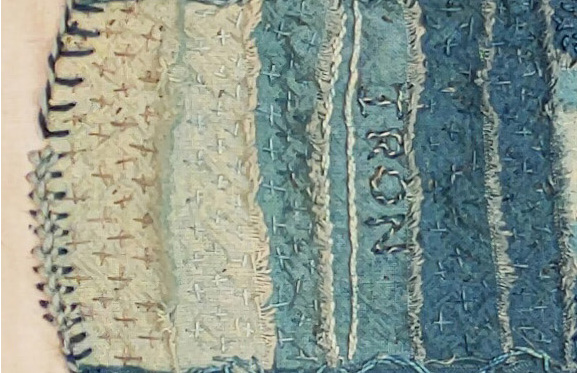
Iron and calico
The centre of this section has the calico material that was dyed with indigo and then iron dipped. The first piece to the centre, is the darker shade, with the next piece being the portion that was sun tested. This continues down the gradient from the centre out.
Iron was stitched In the middle of this section in the same manner as Indigo was stitched earlier. The only difference is that iron dipped threads were used. A line of stem stitched was then done underneath in the mid indigo colour (iron dipped),
The rest of the patches were held down with 1 stranded of stranded cotton in the various shades down the gradient. Rows of crosses were sewn, sitting adjacent to each other, as they are sewn across the patches.
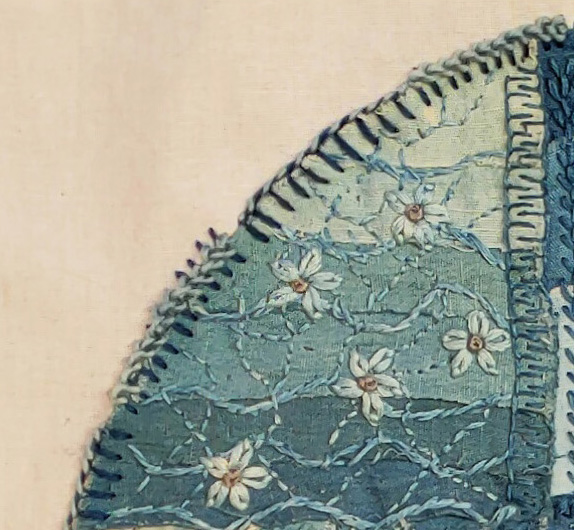
Iron and Linen
The top of this section again involves working with the linen fabric. As you can see the 3 shades run from light to dark down the section with the sun tested piece sitting under each untested.
The stitching starts with 2 rows of blanket stitch which sit between the indigo iron and indigo sections. The straight lines of the blanket stitch are sewn adjacent to each other so the stitches look like they are sitting amongst each other.
All of the rest of the stitching is done with various numbers of stranded cotton. The stitches used include curves of stem stitch, shoot offs of back stitch and flowers of chain and french knots.
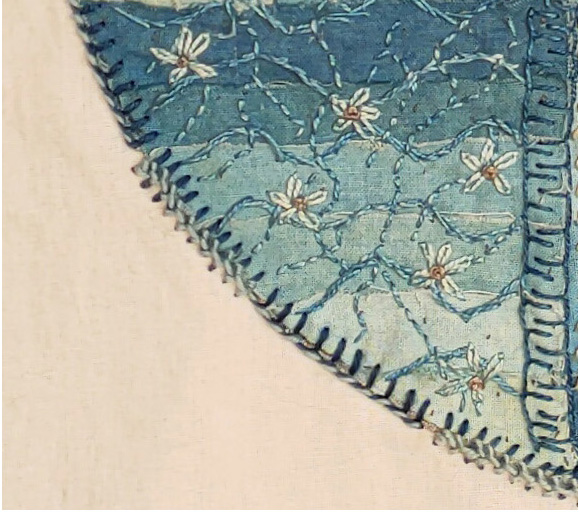
Iron and cotton
The bottom section is completed in pretty much the same way but with the cotton fabric. Perle 8 was used instead of the stranded cotton.
Indigo and Copper
The left of the circle is basically the same as the right hand side. All of the materials and threads were dipped in copper water, rather than iron water, after dyeing with indigo.
I hope you have enjoyed this little walk through the first block of the test dyeing quilt.
Join us on Instagram www.instagram.com/DyetoCraft
Etsy Shop Now open
If you like the idea of using organic naturally dyed threads in your craft but just don’t have the time, come and have a look at our Etsy Shop where you will find an array of beautiful colours provided by nature.