Slow Stitching with Coffee

Slow Stitching with coffee is another example of how you can use natures palette in you own crafting.
Slow Stitching
One of the ways I enjoy using my naturally dyed fibres is slow stitching. It is a relaxing way to just play and see what happens. The main rule and guideline I give myself when sitting down to play is no stress. No ruling up lines and organizing, no pulling out a stitch if it is not in perfect alignment with other stitches and most importantly there are no mistakes.
Now some of you may gasp in horror at this strategy and I myself was exactly the same. Even now after doing quite a bit of slow stitching, I still find myself going to pull a stitch that I feel is too long or too short. But you know what, resisting the urge and allowing things to just happen has not only given me a relaxing way to sew, but I have come to really love the more organic and folksy look that is achieved. Nothing in nature is perfect, which is what makes it so beautiful. And when working with natural dyed products this ethos just seems to match and work well to end in a beautiful natural result.
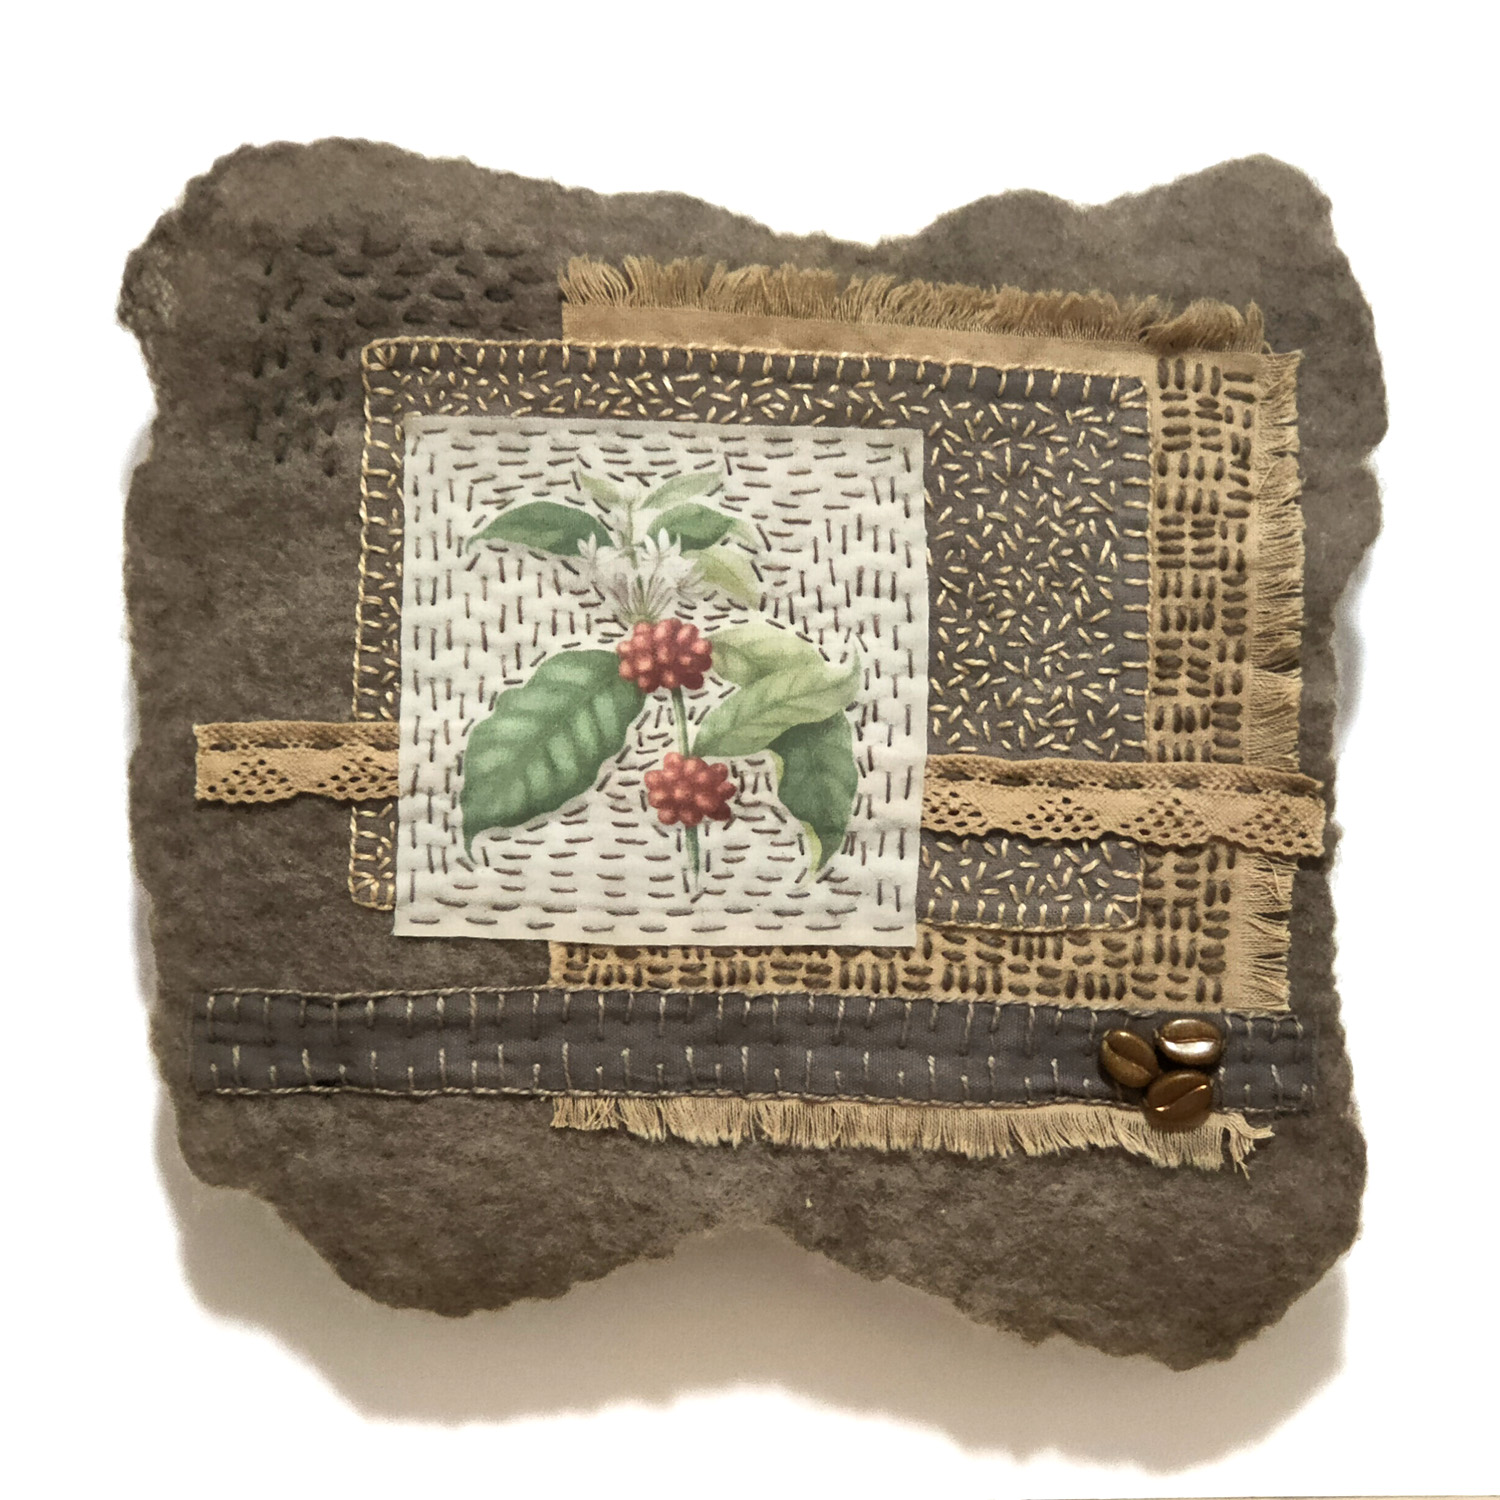
Slow stitching with coffee
So I decided I wanted to create some individual pieces that showcased one particular natural dye stuff. Of course I decided to start with the easiest. Coffee!
This piece contains only coffee dyed materials, except for the botanical print in the middle, which is of course a coffee plant. Oh and don’t forget the coffee bean beads which I was so excited to find.
So now here is the unashamedly shop plug. There is a kit available at the etsy shop which contains all of this natural dyed material to create your own slow stitched piece. You will even have a lot left over to add to your slow stitch stash.
You can of course dye and make everything in this kit yourself. There is more than enough information throughout this website, to give you the tools and know how to dye these materials yourself!
A Great place to start is here:
Starting
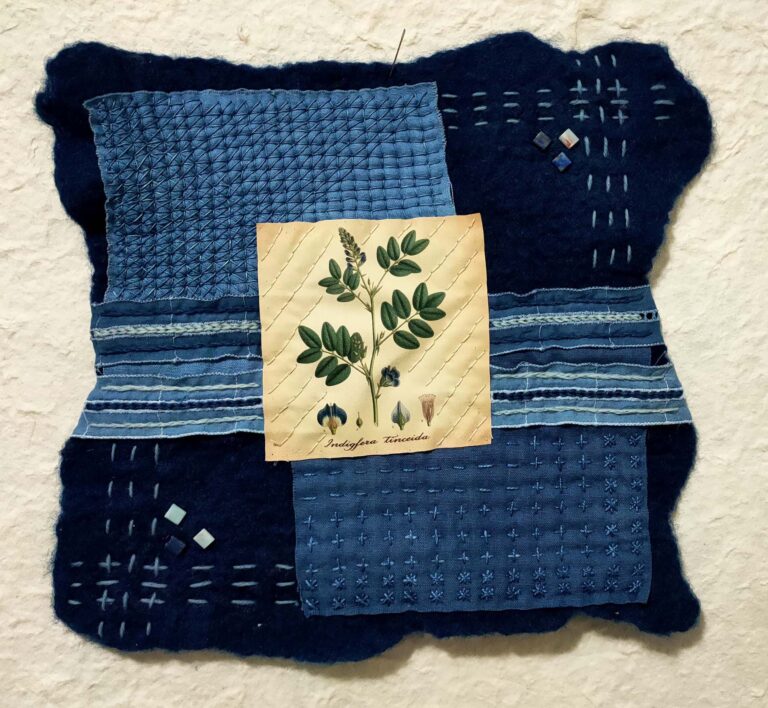
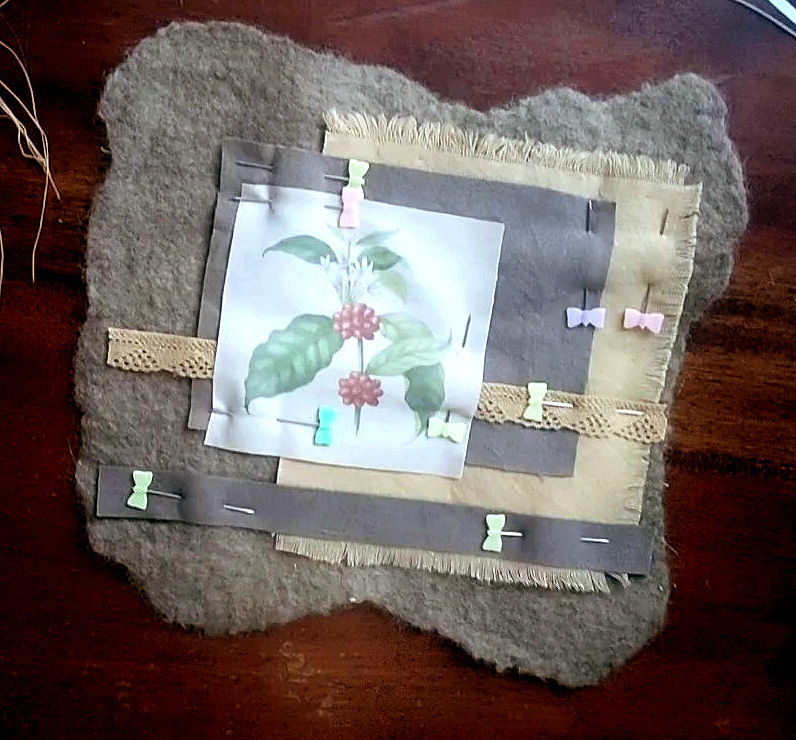
The first thing to do on your slow stitching journey is to cut, place and pin all of your pieces together in way you are happy with. With this example I have started with the lighter cotton piece. It was roughly cut to 12 x 13.5cm, with 3 of sides frayed a little to add a different texture.
On top of this we have the darker cotton cut to approx. 12.5 x 9.5. I have then added the ribbon and lace in a way which I was happy with. Play with all 4 of these cotton, lace and ribbon pieces to see how you like the look of them together. There are lots of different ways that you can place these pieces to give different results, and there is no right or wrong. Its basically what pleases you.
If you have purchased the kit, you will find that the botanical printed fabric has a paper backing sheet. Simply peel this off and cut your fabric to the size you want, before placing it on your felt. My botanical piece was cut to approx. 8cm squared.
Once you have everything placed in a way that is pleasing to you, you can pin everything down and baste into place. When basting use a thread which is different in colour to anything you will be using so you know what to remove later on.
Stitches
Here are a few small videos I have made, that show the stitches I have used in this piece. They are simple and easy to do and all you need to create this piece. The videos can be found on the Dye to Craft YouTube channel and actually refer to a free project that I am working on at the moment, so feel free to check all of the videos out.
Start Stitching
I always start my slow stitch in the middle. I guess this is a rule you use in large quilts to help stop fabrics from buckling, so I don’t think it matters too much on a piece this size. Start where ever you feel comfortable. This is just a run down on what stitches I have used in what areas.
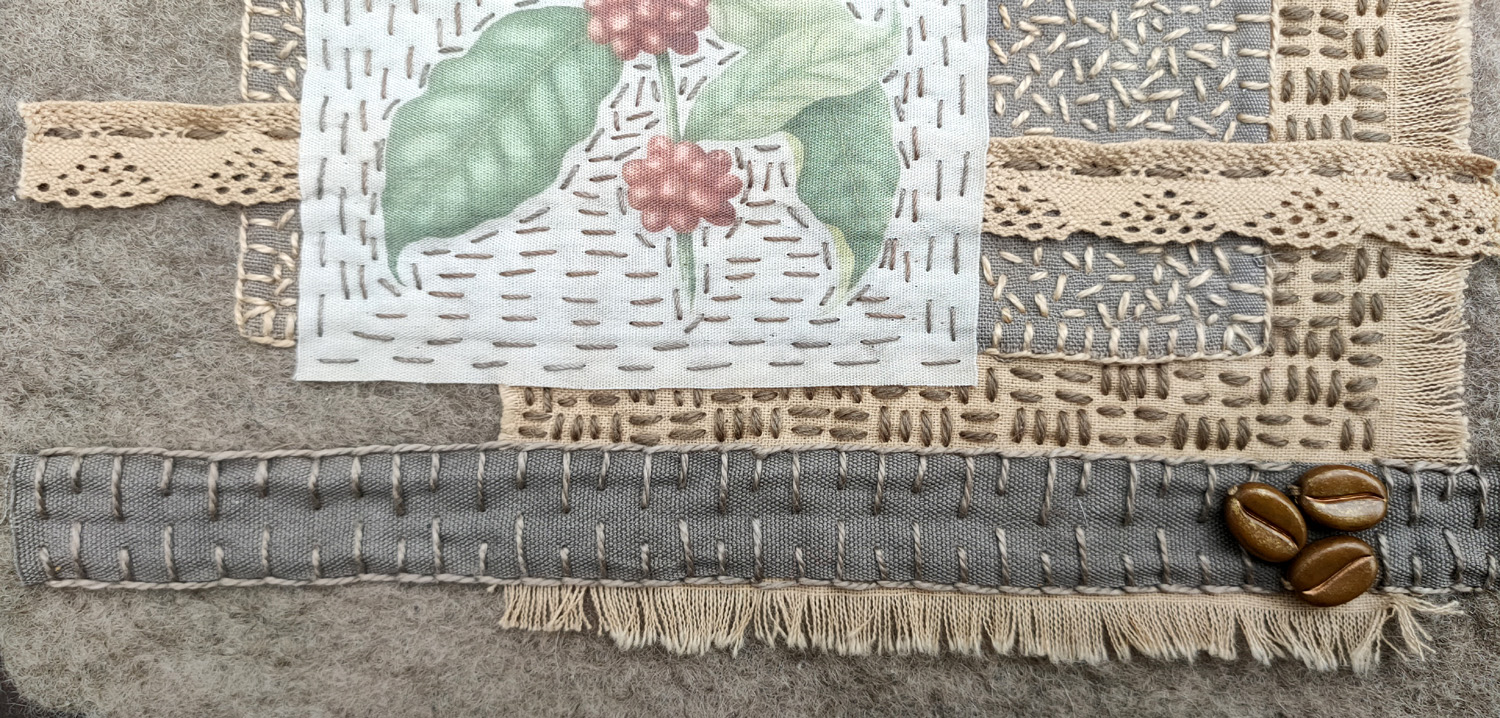
Around the botanical print I first did a running stitch a few mm’s away from the print. I used the thinnest cotton thread in the kit which is equivalent to a 40. I used different shades of the cotton going from lighter to darker throughout this section. Unfortunately it really hasn’t shown up in the photo.
I then proceeded to go around the fabric in a very sloppy square rotation, just going around and around from the outside into the centre. As you can see nothing was ruled up and they are certainly not perfect squares. Refer to the main rule at the start of the post.
The next section I worked on was the darker cotton piece. First blanket stitch was placed around the outside and then seeded stitch inside. This was done using a thicker cotton thread equivalent to a perle 8.


Continuing on
The next piece worked on was the lighter cotton piece. This was a simple geometric pattern of straight stitches, done using 2ply wool embroidery thread. You can either follow this example or have a go at placing straight stitches in any geometric form you like.
Next was the lace and ribbon. First you will need to sew on your bean beads, so you know where to stop and start your blanket stitches. These blanket stitches on the darker ribbon, were sewn the same way as the video, with just alternate lengths to the stitch. As you can see the top and bottom lines of the blanket stitch are lined up so the different lengths in stitch compliment each other. This stitching was done in the perle 8 cotton.
The lace was just held in place with a simple running stitch done in the thinnest cotton thread. Each stitch and space went over 2 holes in the lace.
Finishing
The final piece of stitching is some rows of running stitch on the left corner of the piece. This was completed with 2ply wool embroidery thread.


Slow stitching with coffee.
Your coffee dyed piece is now finished and I hope you are happy with the results. Whether you have bought the kit, dyed your fabrics and threads yourself, or used whatever you have in your own stash, I hope that you have enjoyed the process and are inspired to keep crafting. 🙂
Join us on Instagram www.instagram.com/DyetoCraft
Etsy Shop Now open
If you like the idea of using organic naturally dyed threads in your craft but just don’t have the time, come and have a look at our Etsy Shop where you will find an array of beautiful colours provided by nature.
